LoafNest Super Easy Dutch Oven Bread Maker


When LoafNest sent me one of their cast iron dutch ovens to test out its bread making skills (and the claim that it's the world's easiest artisan bread kit) I assumed my wife would be doing the baking. Not because she's my wife, and a woman, but because she's the one who enjoys turning ingredients into food, and is able to do more in the kitchen than heat up one of those steam-in-bag meals in the microwave.
But then she pointed out that if the whole essence of the LoafNest is that any idiot should be able to use it to bake delicious bread, I should be the idiot giving it a go.
It was a fair point.
So a few days ago, I baked my life's very first loaf of bread. And, to quote my irritating Aunt Jan, "I hate to toot my own horn, but it turned out preeeeetty darn good." Especially considering I did just about everything possible to F it up.
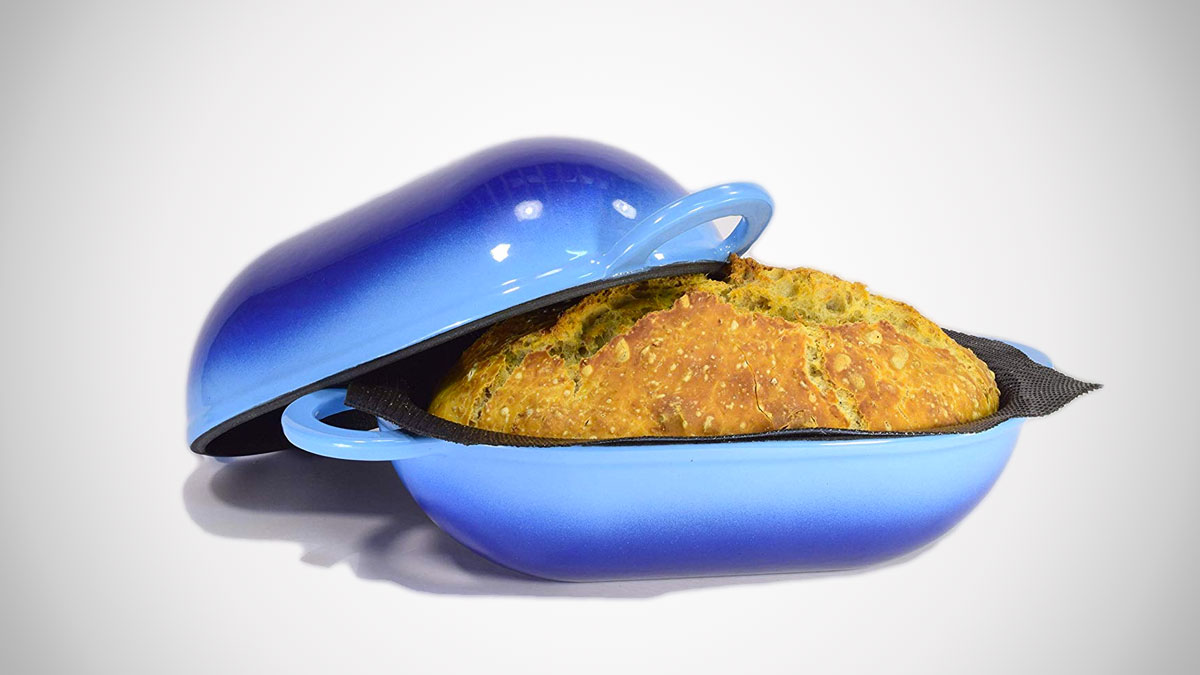
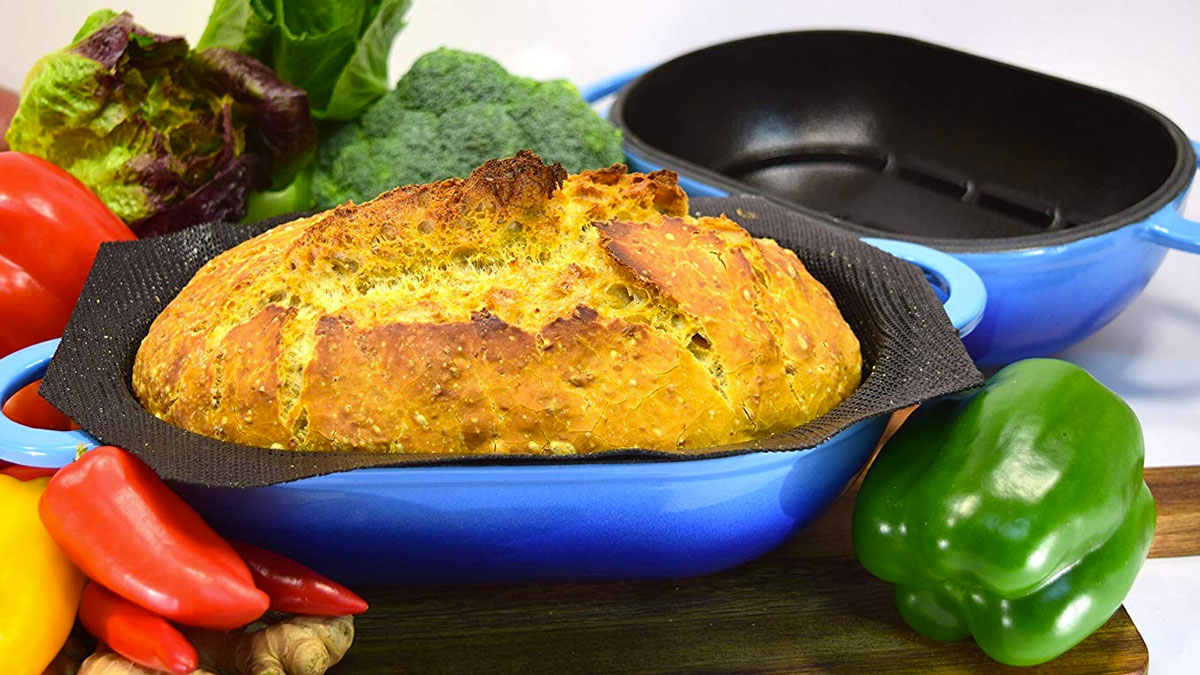
Some LoafNest background: the LoafNest kit consists of a 2-piece oval cast iron dome, with a removable silicone liner that sits inside the bottom piece. When baking bread the liner prevents your dough from sticking, and the dome injects it with 360-degree heat - dutch oven-style, but shaped like a loaf of bread.
The benefit of using the dutch oven and liner is that they do all the work for you, eliminating the need to knead, shape, and fuss with your bread dough to prep it. You preheat the LoafNest in the oven for at least 45 minutes, and then dump your risen dough into the liner to bake for another 45 or so.
Prior to that, you'll spend 5 minutes or less measuring out flour, water, salt, and yeast (for the basic recipe) and then about 18 hours sticking the dough in a corner and letting it rise. (Yes, I said it was a super easy process, not a super fast one.)
During my LoafNest trial run, here are a few things I did not do right:
- The LoafNest recipe book specifies using bread flour for its recipes, which is different than all-purpose and pastry flours due to protein contents or something. The instruction booklet explains this in great detail, but I didn't have any bread flour and a trip to the store was not in the cards, so I used...I don't even know what I used. It was white and it was flour.
- Suggested rise time after mixing the dough is 18 hours, with tips for how to tweak that with more/less yeast or different temperatures to better fit your schedule. I let my dough rise for about 18 hours at room temp, and then put it in the fridge to stop the rising process because I wasn't ready to make it yet, and then took it back out for another hour or so while I preheated the oven and took a nice long shower.
- When I took the dough back out of the fridge I set it on the oven, which was preheating. The back of my oven has a vent that blows out oven heat when the oven is on. The bowl was right next to the vent. A little portion of my bread sort of started cooking in the bowl. Oops. I had to scoop that bit out.
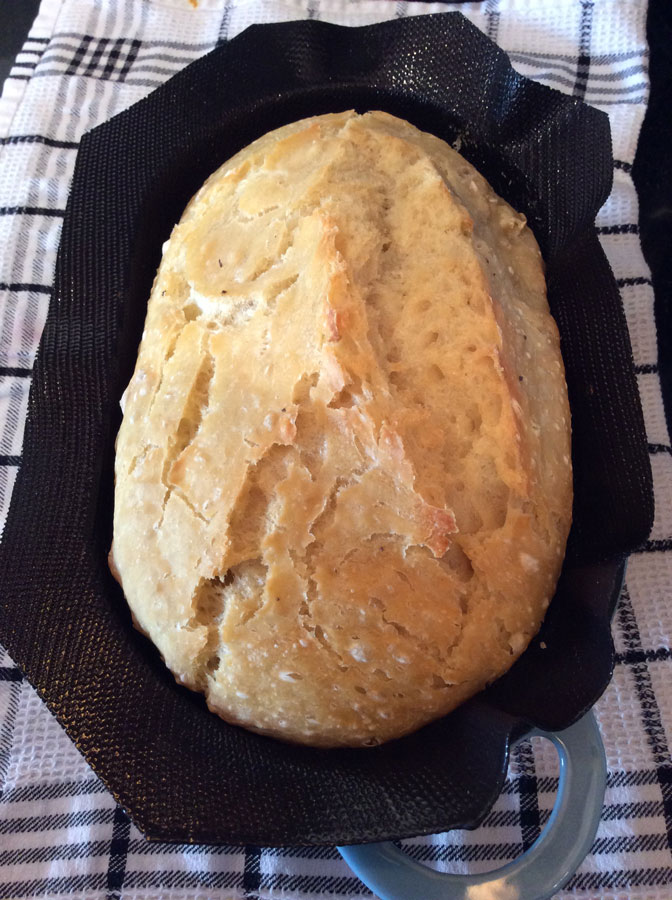
Despite all of the above, and my status as a baking novice (fine, idiot) my bread turned out edible! It was a little dense and chewy, but She-Ra: Princess of Power had made a saucy pasta dish that night, and it sopped up the creamy tomato goodness like a yeasty, spongy, glutinous champ. And it looked beauteous. The non-professional images in the gallery above are my own.
I'm planning on LoafNesting up loaf #2 this weekend.
DudeIWantThat.com is reader-supported. When you buy through links on our site, we may earn an affiliate commission. As an Amazon Associate we earn from qualifying purchases. Learn more.
/snow-melting-stair-mat-62406.jpg?mode=crop "Snow-Melting Stair Mat")
Snow-Melting Stair Mat
What?! A snow-melting stair mat? But, but, why? Everyone knows the best part of piled-up Mother Nature dandruff is watching people wipe out trying to navigate through it! I do feel bad for the AARP-aged ones when they...
/magicalbutter-cannabis-cooker-62400.jpg?mode=crop "MagicalButter Cannabis Cooker")
MagicalButter Cannabis Cooker
Easily make medicinal butter, oils, tinctures, lotions, and sauces. Hear that? MagicalButter is so named for its power to convert healing herbs into healing herb culinary creations. So start coughing and breaking into...
/disturbed-friends-the-worst-62430.jpg?mode=crop "Disturbed Friends - The Worst Game Ever Made")
Disturbed Friends - The Worst Game Ever Made
Consumer drones? Wearables? Self-driving cars (and -walking shoes)? Nah. I think politically incorrect card-based games that at some point make every person playing them feel extremely uncomfortable or self-conscious...
/heng-balance-magnetic-switch-62549.jpg?mode=crop "Balancing Magnetic Switch Lamp")
Balancing Magnetic Switch Lamp
Newton's Cradle meets abacus meets the first day of creation in these balance lamps with magnetic switches. Li Zanwen created the desk lamp design with a pair of magnetic wooden balls on strings at the center that attract...
/earwax-candle-kit-56889.jpg?mode=crop "Earwax Candle Kit")
Earwax Candle Kit
Here comes the Earwax Candle Kit just when you thought you couldn't find the perfect gift for your mom. I don't know about yours but I know my mama loves candles, and also hates waste, and based on the number of used...
/night-vision-goggles-62570.jpg?mode=crop "Night Vision Goggles")
Night Vision Goggles
These hands-free night vision goggles mean surveillance, after-dark expeditions, and finding the perfect bush to pee on in the middle of the night aren't just possible, they're on like Donkey Kong!...
/spyfinder-pro-hidden-camera-62610.jpg?mode=crop "Hidden Camera Detector")
Hidden Camera Detector
Hidden cameras watching me in the dressing room? In my vacation rental? In the office? ... Well, I figured they're watching me in the office. Listen, I'm not trying to stir up any paranoia here, but this hidden camera...
/jumbl-puzzle-board-wooden-46537.jpg?mode=crop "Jumbl Puzzle Board Wooden Jigsaw Puzzle Table")
Jumbl Puzzle Board Wooden Jigsaw Puzzle Table
What, you can't finish that 1,500-piece jigsaw puzzle of a color gradient in one sitting? Sigh. Why'd you open it then? Now it's going to be cluttering up the dining room table for the next 3 weeks! Shoulda bought a Jumbl...
/headache-migraine-relief-cap-62512.jpg?mode=crop "Headache & Migraine Relief Cap")
Headache & Migraine Relief Cap
Headache? Migraine? Just want to bury your head in the freezer or a bucket of ice? How about a striking purple hat filled with cooling, soothing, pain-easing frozen gel instead?...
/plufl-the-dog-bed-for-humans-62576.jpg?mode=crop "Dog Bed for Humans")
Dog Bed for Humans
Welp, we've got dog food for humans, so why not dog beds for humans? Thank you Soylent, and now, YAEM...
/screaming-aztec-death-whistle-62534.jpg?mode=crop "Screaming Aztec Death Whistle")
Screaming Aztec Death Whistle
How have I never heard of a Screaming Aztec Death Whistle? In all my efforts to exact revenge on my ex-girlfriend, Karen, in all my attempts to prank my friend Cornelius, in all my ploys to convince my mother-in-law our...
/rechargeable-heated-slippers-62388.jpg?mode=crop "Rechargeable Heated Slippers")
Rechargeable Heated Slippers
Rechargeable Heated Slippers may be a boring, uninspired idea for a holiday gift, but they're not a bad idea. Think of all the people with cold feet out there. And all the people who have moderately warm feet inside...